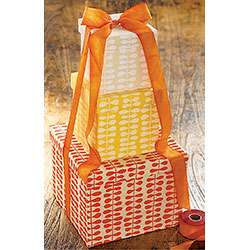
Paper Covered Nesting Boxes
Materials:
Step-by-Step
-
-
- On a sheet of scrap paper, turn a box base upside down, and wrap the decorative paper around the box to measure how much width of decorative paper you will need. If the box is large, you may need to use 2 sheets of paper. For smaller boxes, trim the paper so that there is a 2″ excess of trim to overlap the paper.
- Next, trim the height of the paper so that there is enough paper to wrap onto the bottom of the box.
- With the box still upside down, start at one edge of the box and cover one panel of the box with PVA glue. The paper should be flush with the box opening and the excess should be at the base to wrap onto the bottom of the box. Apply the paper to the first edge, and then apply PVA and wrap the paper around all four sides of the box, smoothing the paper as you go.
- Apply PVA to the base of the box and wrap the paper onto the base of the box, triangulating as though wrapping a gift.
- Next, to wrap the lid, place the decorative paper face-down on the scrap paper. Apply PVA glue to the entire box lid top and sides and place onto decorative paper. Wrap the paper around the sides of the box, again, wrapping as though wrapping a gift box. Apply a small amount of PVA to the inside of the box lid and wrap paper around the inside to secure.
- Allow to dry overnight before placing box lid onto the base.
- Tie with a beautiful ribbon for finishing touch!
-


