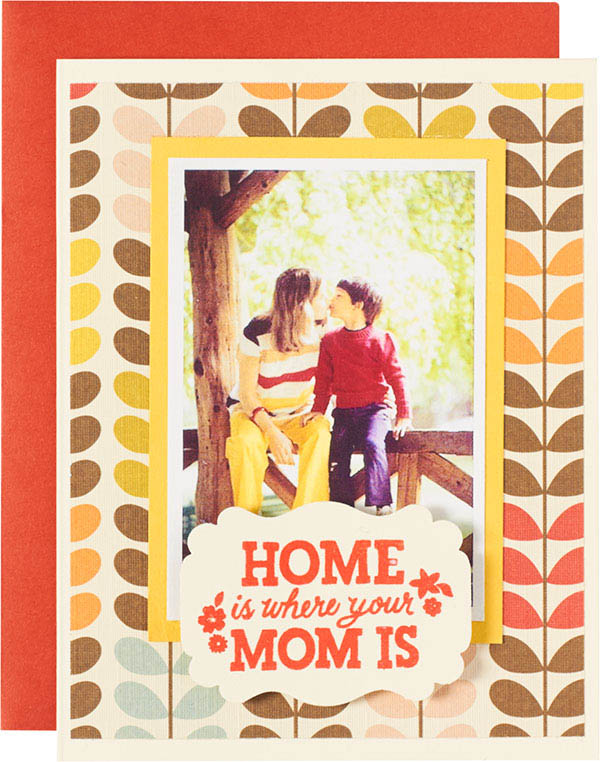
We have some unique cards for Mother’s Day, but if you’re looking for a D.I.Y. that’s uniquely personal, here’s a quick and easy photo card tutorial.
MATERIALS
- Solid Folded Greeting Card
- Fine Paper
- Solid Paper
- Printed photo
- Scissors or Knife
- Glue Stick or Double-Sided Tape
- Real Estate Sign Paper Punch
- Home is Where Your Mom Is Rubber Stamp
- Embossing Powder
- Inkpad
- Heat Embossing Tool
- Foam Squares
INSTRUCTIONS
- Start with a photo of you and mom that will fit on the front of a card.
- Measure your photo size, then allow for a border on each side. With your new measurement, cut a solid paper background. (For instance, a 2″ x 3″ photo with a 1/2″ border on each side would need a 3″ x 4″ background.) Paste the photo on the paper with a glue stick.
- Cut a piece of fine paper or wrapping paper to size for your chosen card, leaving an approximate 1/4″ – 1/2″ border on the front of the card. Paste into place with a glue stick.
- Adhere the photo and solid paper in the center of the card that is now covered with fine paper.
- Punch out the front card using the Real Estate Paper Punch.
- Stamp onto the punched out card and emboss with the embossing heat tool.
- Adhere punched card to front of greeting card using foam squares.


