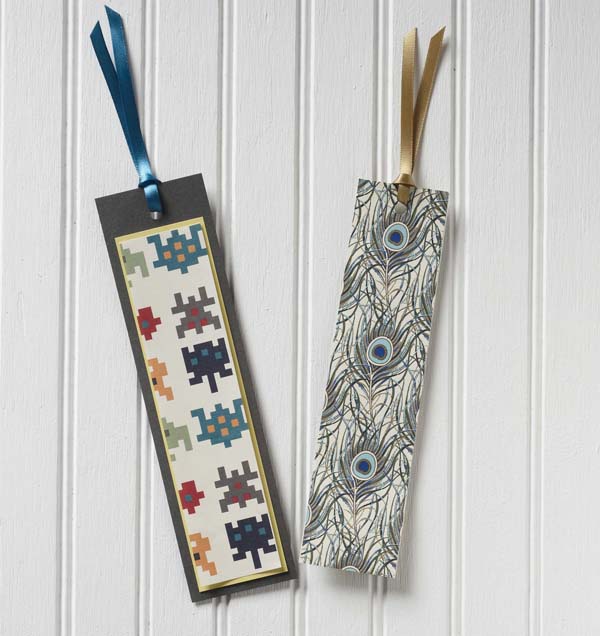
Head back to school (or the office) in style. Use pretty paper to mark your place and accentuate your love for all things paper. Follow the steps below to create a customizable bookmark like the one shown on the left.
Materials Needed:
- Your selection of fine paper (1 sheet)
- Your selection of solid cover paper, 2 colors (2 sheets total)
- Double-Sided Permanent Tape
- Scissors or Guillotine Trimmer
- 1/4″ Round hole punch
- Your selection satin ribbon, 6mm
Instructions:
- Cut your selection of solid cover weight paper to 8 1/2″ by 2 4/16″. This will serve as the backing of your bookmark.
- Cut your second choice, solid cover weight paper to 7 6/16″ by 1 14/16″. This will serve as the accent color of your bookmark.
- Cut your selection of fine paper to 7 4/16″ by 1 3/4″.
- Adhere accent paper to backing paper using double-sided permanent tape. Justify more toward the bottom so as to leave room for punch and ribbon detailing.
- Adhere fine paper to accent paper using double-sided permanent tape.
- Using the 1/4″ round hold punch, punch roughly 2 cm down into the top, center of your bookmark.
- Cut a 10″ piece of 6mm satin ribbon (choose your favorite). Cut from spool at an angle for style. Fold in half, pinch, and thread through the back of the bookmark (the side with no accent paper or fine paper).
- Pull the two strands of ribbon up and through the loop you’ve just created.
Alternately, you can create the variation on the right using any of our fine papers and Xyron Machine. For an alternative style check out our fancy bookmark how-to.
Happy reading!


