…courtesy of our stellar Creative Intern, Caroline!
Cute, customizable Christmas fun- what a tree-t! I made several of these fringy fellows and used them to decorate for a holiday tea party I held this past weekend.
You’ll need:
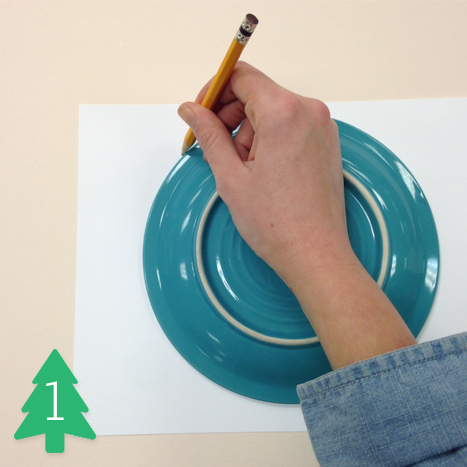
Cut a circle out of card stock. The bigger it is, the taller your tree will be. To cut a perfect circle, set a plate on your card stock and trace the outline in pencil.
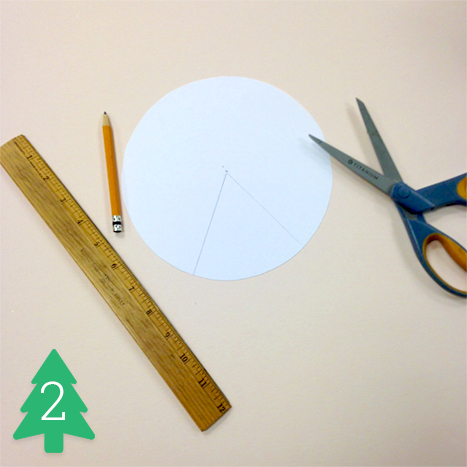
Find the center of the circle- it doesn’t have to be exact, this isn’t geometry class!
Use a ruler to draw a line from the center to the outside. Repeat this step to form a triangle. If you want a fat ‘n fluffy tree, cut a small triangle. Looking for a slender tree? Cut a larger triangle. Don’t despair if it’s not perfect, you can always trim your tree!
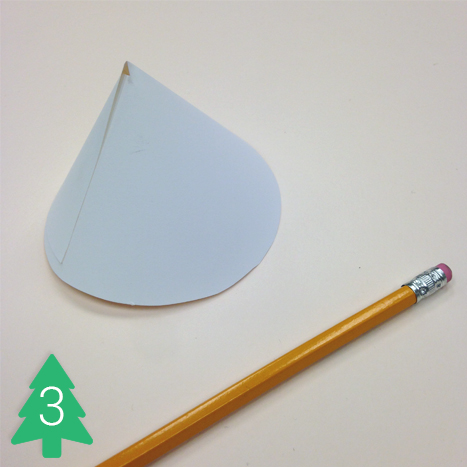
Take one side of your triangle and overlap the other edge- this should form a cone. Using your hot glue gun, adhere the two edges.
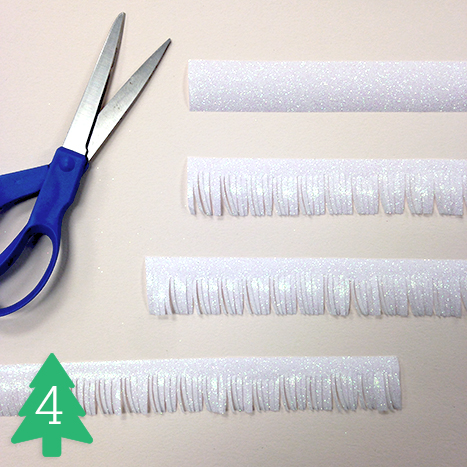
Cut 1.5 inch wide strips of sparkle glitter wrap. The length of these strips can vary.

Cut 1 inch slits into the strips of wrapping paper to form the fringe. All that cutting is a great way to *sharpen* your scissors skills!
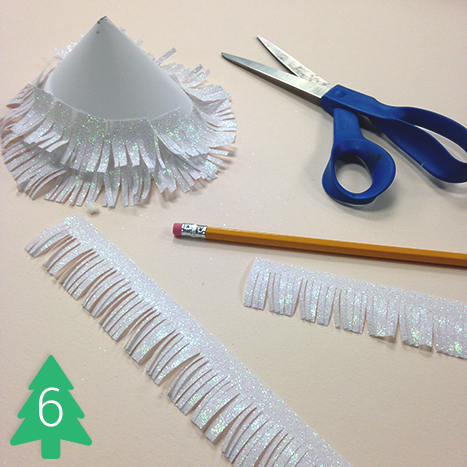
Before you glue the fringed paper to your cone, wrap it around a pencil to give it a bit of a curl- this makes the tree look more realistic.
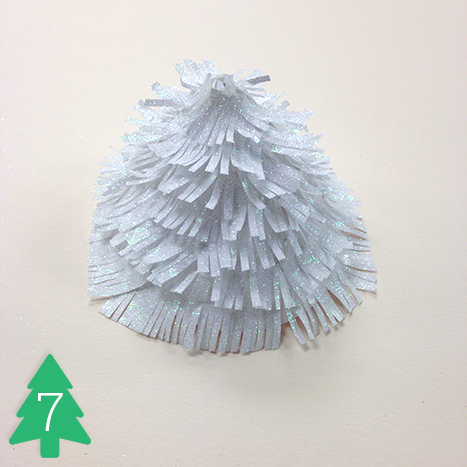
Flip your paper so it’s glitter side down. Hot glue the solid 0.5 inch left above your curled fringe and stick it to the tree. Start at the bottom of the cone and work your way up, making sure to overlap the layers of paper. The length of your strips should get progressively smaller as you work toward the top of the cone.

(optional). To give your tree a topper, cut a small slit in the tip of the tree for a star to nest in. Using this same technique, you could also turn your fringed tree into a place card holder!
Great things about this craft:
- Fringe hides most imperfections (& looks great on boots).
- You can vary the looks of your trees by changing the size of the circle, the angle of your triangle, and the wrapping paper you use for the fringe.
A very crafty Christmas to you and yours!
-Caroline


[…] this blog post for detailed instructions on making the […]