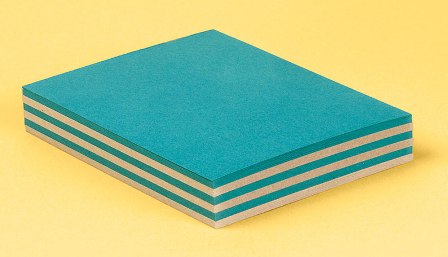
Jot lists, to-do’s and ideas on this E-Z to make and stylish notepad. Make it tall, make it small! Customize your notepad colors to suit any mood or room in your home. Handmade notepads make fun gifts for friends – don’t forget to pair them with paper covered pencils!
 –Annie
PS colors: gravel & beet
Latest fave: Japanese 8 1/4″ Scissors
Materials needed:
How to PDF
3-4 packs of A2 Note Cards (use two different colors for a jazzy pad!)
PVA
Glue Brush
2 Rulers
1-2 Jumbo Binder Clips
Instructions:
1. Stack A2 Note Cards (alternating colors optional). Jog sides back and forth on a flat level surface until desired edge is completely flush.
2. Cover one edge with PVA to bind cards.
3. Carefully sandwich the glued edge between two rulers, then clamp with jumbo binder clips. The rulers will protect the paper from the clips. Set aside to dry.
4. If necessary, apply another layer of PVA and set aside to dry. Once completely dry, unclamp and use!


wanted to let you know i’ve devoted 2 blog posts to you guys 🙂
http://jacinandpat.blogspot.com/2010/07/girls-night-out-stationery-workshop.html
http://jacinandpat.blogspot.com/2010/06/i-heart-paper-source.html
thanks for continuing to inspire me!
What an easy project! Here’s an idea: it will take a little bit longer, but this memo pad can be personalized with a cute stamp on each sheet.
Will it work with regular paper ?
An even easier way to personalize or jazz up your notepad–use your printer to print a name, monogram, cute clipart or dingbat on each page, then glue.
always love the ideas from PS and the other posters… question… is it possible to show a pic of step 3 in the process as I’m at a loss as to what that actually means….
…scatter joy…
I LOVE this idea. It seems like PVA is the miracle glue!
Melissa 🙂
to lindsey who’s confused about step three. since i can’t demonstrate that i’ll do my best to explain what they mean. you want to make sure that all the pages stick together when it is drying so you have to apply some pressure to that area by using binder clips or something similar. but you don’t want glue to get all over the clips and have them get stuck too. so they suggest that you put a ruler on the top page and a ruler on the bottom page and then use a binder clip to hold everything in place. hope that makes sense!
ps. don’t put the binder clips directly parallel to the glued edge! put them to the left and right sides of the glued edge. this’ll let you apply for glue in step 4 if necessary.
beth – it will, absolutely, work with regular paper. the beauty of the “e-z” part is that our cover (heavier weight) paper is already cut to sizes that are ready to be glued!
I took their book binding class, and we made this pad of paper.
It is SOOOOOOOOOOOOOOO easy! PVA is amazing. They sell it in a jar and a bottle. Get the jar so you can get all the glue out of it.
It’s a wonder!
And you can make pads out of anything!!!! I love all your ideas!
Jane