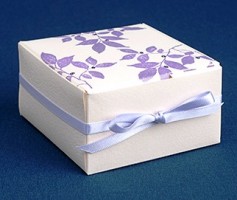
 Requested by SO many of our customers, this spring we introduced the classic square favor box. This perfect little square is quickly becoming one of our favorites to embellish. With just a few folds and double stick tape they are ready to fill with little cookies, tiny treasures, or four exquisite truffles.
Here’s a great way to dress up favor boxes with ribbon, rubber stamps and glitter glue. Layering violet and silver ink creates an elegant muted tone and can be done with any color combination (use any base color with silver on top).
Pick a ribbon, ink color and rubber stamp design to coordinate with your wedding or party theme!
– Claudia
PS colors: curry & fuchsia
Latest fave: Mini Magnolia Paper Flower Kit
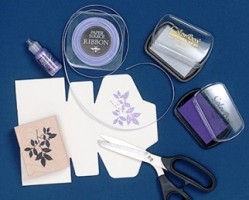
Materials Needed:
Classic Square Favor Box
Leaves Rubber Stamp
Violet Color Box Inkpad
Quicksilver Color Box Inkpad
1/4″ Satin Ribbon
Stickles Glitter Glue
Scissors
Embossing Heat Tool (optional)
Instructions:
1. Rubber stamp an all-over pattern onto a flattened (unassembled) square favor box. For the two-tone effect first ink the rubber stamp with violet ink, then ink on top of the violet with silver ink. Repeat the inking process for each rubber stamp impression for best results.
2. Carefully blot the stamped favor box dry with clean scrap paper or heat set the ink with a heat embossing gun.
3. Once the stamped design is dry assemble the favor box as instructed.
4. Cut approximately 20″ of satin ribbon and tie around the box side panels, finishing with a bow.
5. Accent with glitter glue and set aside to dry.


