Check out our DIY collaboration with Nic Stevenson from Dear Handmade Life! Nic came up with a cool way to showcase photos of her and her husband in the beautiful photo mobile! You can get to know Nic and DHL next spring at Craftcation: Business & Makers Conference.
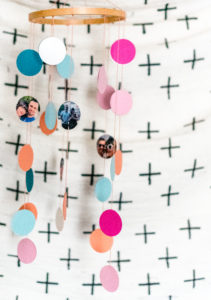
Living in this digital age, it’s so easy to snap a million photos & forget about them or just let them sit on your phone or computer. Recently, I realized that the only printed photos my husband and I have in the house are from pre-2010, maybe? I wanted to change that and display them in a fun and creative way. I came up with this cute photo mobile!
Let me show you what I did.
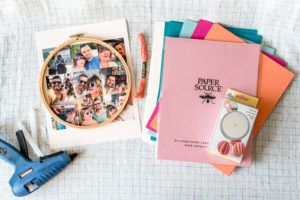
TOOLS AND MATERIALS:
Embroidery Hoop- I used a size 8
Photos I printed at home on the Paper Source Card Stock
Embroidery Floss
Step 1:
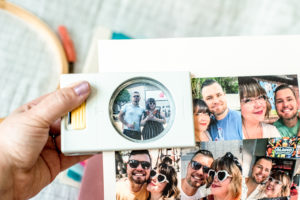
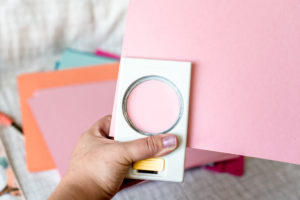
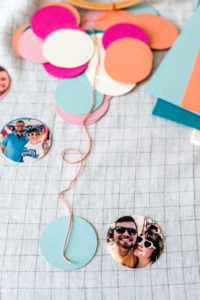
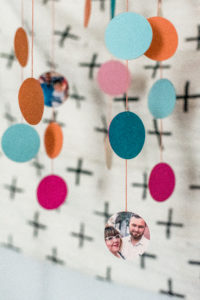
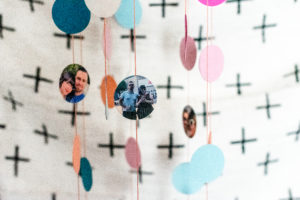
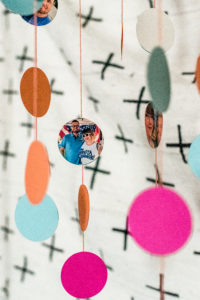
Since the paper punch I’m using is about 2 inches, my photos needed to be small enough to fit inside of that. Also, since I was pulling the photos from my phone I decided to use the Layout App by Instagram to make a collage of the photos I wanted to use. I then transferred the final image to my computer and printed it onto a sheet of card stock in the color ‘blush’. Then, just punch your photos out! You could just cut them into whatever shape you like, but the punch makes this process so much quicker & more consistent. Then, punch out a bunch in the various shades of card stock you’re using.
Step 2:
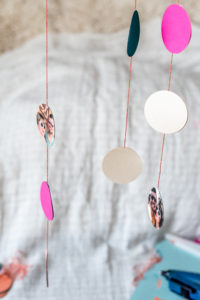
To decide how long I wanted the little strips to hang I tied a piece of embroidery floss to the hoop to measure it. I eyeballed everything here, and the length is completely up to your liking. To attach the paper/photos, I started at the bottom & sandwiched the embroidery floss between 2 cut-outs with a little bit of hot glue & pressed it together to smooth it out.

Step 3:
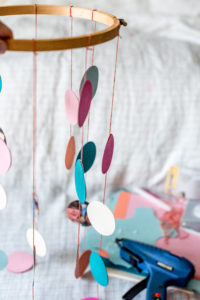
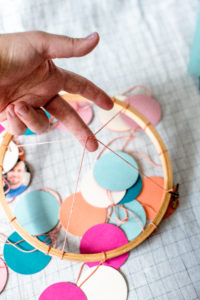
Once I was happy with my first strip, I moved on without tying the floss to the hoop first. I used various lengths of floss and added the cut-outs in different places and varied how many I used on each strip. After gluing them to the floss, I tied them to the hoop and held it up to see how it was looking as I went. I would fill in the gaps as I saw fit. This will all be up to your aesthetic. I wanted mine to be varied, with the photos as little pops, mixed in with the colors. You could choose to put a photo on each one, back to back photos, or just all paper!
Step 4:
For the hanger at the top I just tied more embroidery floss on each side of the hoop. There was a total of 4 places so that it would hang evenly. You could also use a thicker string or ribbon here. And you’re done!
This would make a super easy and cute gift! You could pick a theme, babies, pets, friendships, anniversaries, weddings, the possibilities are endless!
Nik’s bio:
Nik is a maker, day dreamer & potty mouth who loves cats, coffee and craft beer. She is a self-taught hand embroider and will DIY pretty much anything she can get her hands on. You can see her work on IG @wastingthyme & @nikvphotography. She lives in Long Beach with her husband and her three awesome cats (that she can’t shut up about).
About Dear Handmade Life:
Dear Handmade Life curates events, education and community for creative misfits and lovers of artful living. They have been fostering creativity and entrepreneurship through its events including Patchwork Show: Modern Makers Festival (a bi-annual multi-city craft fair), Craftcation: Business & Makers Conference and its online platform which includes a blog, podcast, online workshops and an engaged social media community for over 10 years.
CEO and Creative Director Nicole Stevenson’s passion for all things creative and helping makers do what they love for a living inspires Dear Handmade Life’s award-winning events and fuels their thriving online audience.


