 Knot tying is a wonderful gift wrapping technique, and offers a modern alternative to bows. It also uses slightly less ribbon and works great if you’re shipping wrapped packages (bows can get crushed in the mail). The instructions below will teach you how to tie a knot using our double-faced satin ribbon. Don’t forget, always use a pair of sharp scissors when cutting ribbon – nobody likes frayed edges.
–Annie
PS colors: gravel & beet
Latest fave: Tree Trunk Tea Light and Japanese 8 1/4″ Scissors
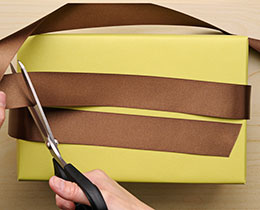
1. Measure your ribbon by going around the box, ending edge to edge on the top of box (so around once, plus one more side of the box). Leave enough extra ribbon so you can trim the edges again, if necessary, after your square knot is tied.
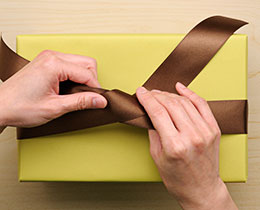
2. Wrap ribbon around the box from the bottom to the top. Hold ribbon taut around the top of the box, and with your right hand pull the length of ribbon on the left over and under to create a single tie, as you would when tying your shoe.
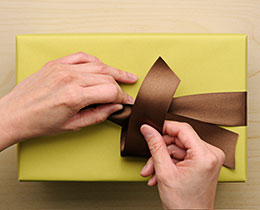
3. Hold the tie tight with a finger. Take the right ribbon tail over and behind the left ribbon tail, then through the loop you’ve created. Gently pull in a horizontal fashion to tighten the knot.
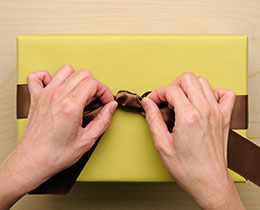
4. Using both hands straighten and flatten out the knot in the middle of your ribbon.
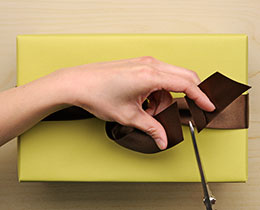
5. To create even edges, pull together both ribbon tails and cut at the same location. Cut at any angle you please. Sharp scissors are a must!
There – a simple, clean knot ready for a gift tag.
P.S. A simple way to remember how to tie a square knot when you don’t have instructions in front of you is, “left over right, right over left.” With a little practice and this rule of thumb, it will seem easy!


Awesome instructions! thank you 🙂
Fabulous! Thanks for sharing!
Thanks! I’ve made my life easier and my packages look beautiful.
Thanks for the visual. I love tying perfect square knots, but always struggle to get started. Can we get this instruction in a PDF??
Thanks a lot. This was helpful
Attractive packing tutorial. Awesome very helpful. Great work.